In California, grid-tied systems must be installed by a contractor holding a valid C-46 Solar or C-10 Electrical license — no exceptions. NABCEP-certified professionals represent the industry's quality benchmark above and beyond that licensing requirement.
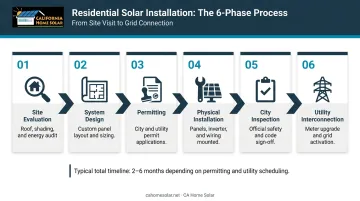
This guide covers every phase of a proper residential solar installation in the Los Angeles area: site assessment, permitting, physical installation, post-installation validation, city inspection, and utility interconnection.
Key Takeaways
- The full process — from contract signing to permission to operate — takes 2–6 months in Southern California; physical installation itself is just 1–3 days
- Permitting and utility interconnection cause most delays, not the installation crew
- California requires licensed contractors (C-46 or C-10) and pulled permits before any grid-tied work begins
- Common failure points: improper roof flashings, missing circuit labels, wiring that doesn't match permitted plans
- An experienced, licensed local installer reduces rework, failed inspections, and system underperformance over time
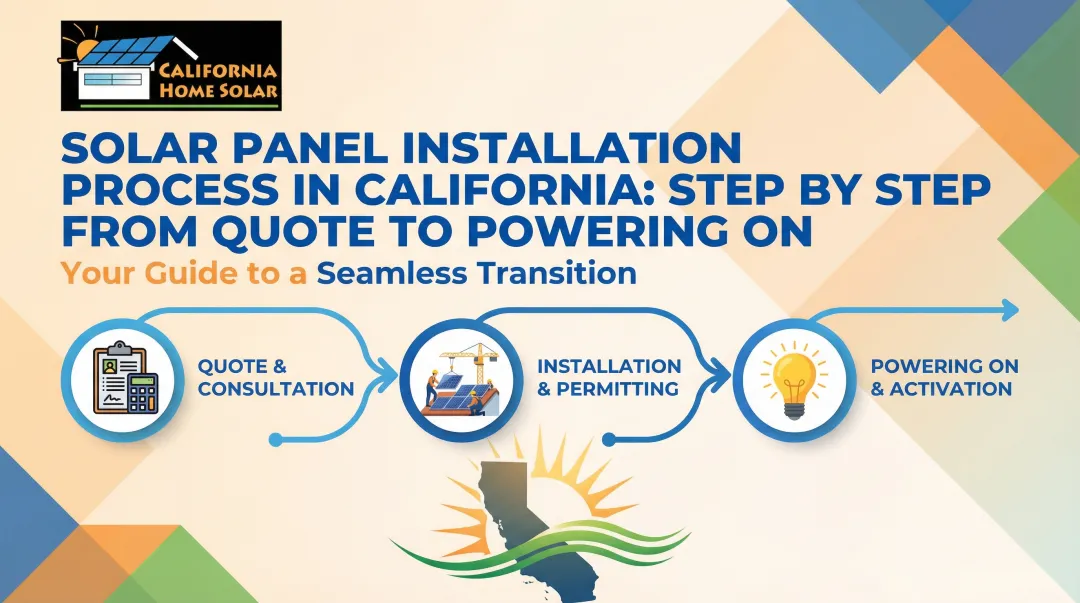
What the Full Solar Installation Process Involves
Residential solar installation follows a defined sequence: site evaluation → system design → permitting → physical installation → city inspection → utility interconnection. Rushing or skipping any phase creates downstream problems: a permit application submitted before the shading analysis is complete produces a poorly sized system, and starting installation before permit approval puts the entire project at risk.
Realistic Timeline for Southern California
According to CPUC consumer guidance, the contract-to-installed-system timeline for residential solar is typically 1–3 months, with utility approval taking an additional 2–3 weeks after installation.
For Los Angeles-area homeowners specifically:
- Permit review: The California Solar Permitting Guidebook targets 1–3 days for standard residential systems
- AHJ inspection: Should be scheduled next business day after work completion
- SCE interconnection: Most customers receive permission to operate (PTO) within 10 business days after complete documentation is submitted
- LADWP interconnection: Follows a multi-step Type 1/2/3 process; no official queue-time figure is published, so ask your installer for current estimates
Prerequisites Before Work Can Begin
Several factors must be confirmed before any installation proceeds:
- Roof condition: The roof needs sufficient remaining serviceable life — panels installed on a roof due for replacement in 3–4 years will need to be removed and reinstalled at significant cost
- Structural capacity: The roof structure must support the added panel weight
- Shading analysis: Evaluate shade across all hours and seasons, not just midday — nearby trees, chimneys, and HVAC units can meaningfully reduce annual output
- Panel orientation: South- and west-facing surfaces perform best in Southern California
- Electrical panel capacity: CEC solar-ready guidelines for new California homes specify a minimum 200A busbar rating; older homes may require a panel upgrade before solar can proceed
If your roof needs work before panels go up, California Home Solar's solar-ready roofing service assesses and prepares the structure as part of the same project — eliminating the risk of a costly remove-and-reinstall later.
California-Specific Requirements
- Contractor must hold a valid C-46 or C-10 license
- Your contractor must pull permits from the local AHJ before any work begins
- HOA approval may be required — though California Civil Code 714 voids HOA restrictions that add more than $1,000 in cost or reduce efficiency by more than 10%
- California's Net Billing Tariff (NEM 3.0), effective for applications submitted on or after April 15, 2023, compensates exports at avoided-cost rates rather than retail rates — this directly affects how system size should be optimized
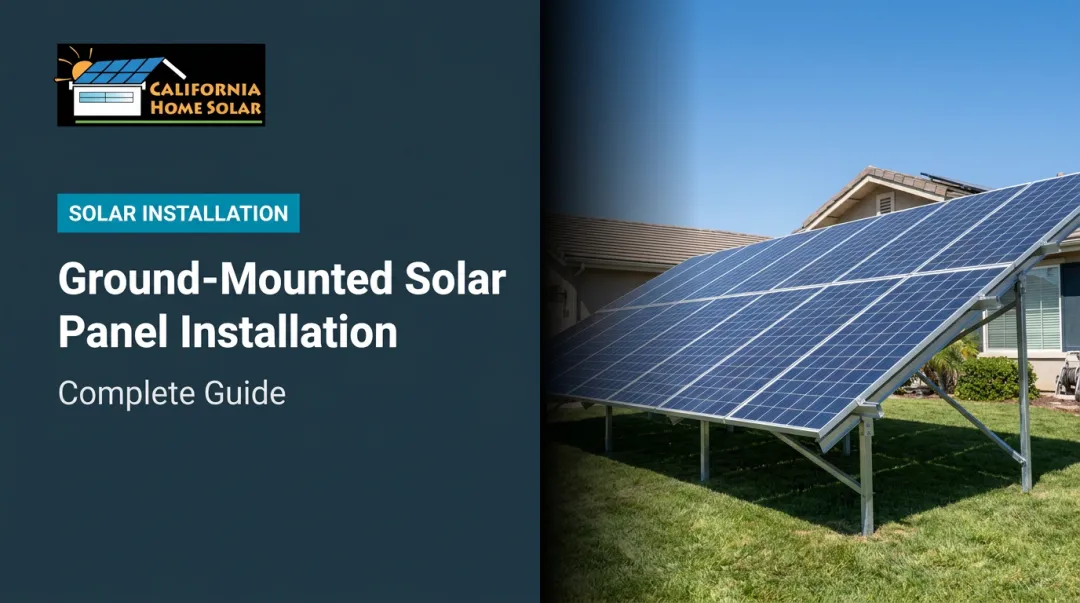
How to Install Solar Panels: Step-by-Step
Installation follows a strict sequence. Deviating from it (such as wiring panels before racking is fully secured) creates rework and safety risks.
Step 1: Site Prep and Layout
Locate and mark roof rafter positions. Plan the panel layout to maximize south/west-facing surface area while avoiding obstructions: vents, skylights, and HVAC units. Verify the electrical panel has available breaker capacity for the solar circuit before any rooftop work begins.
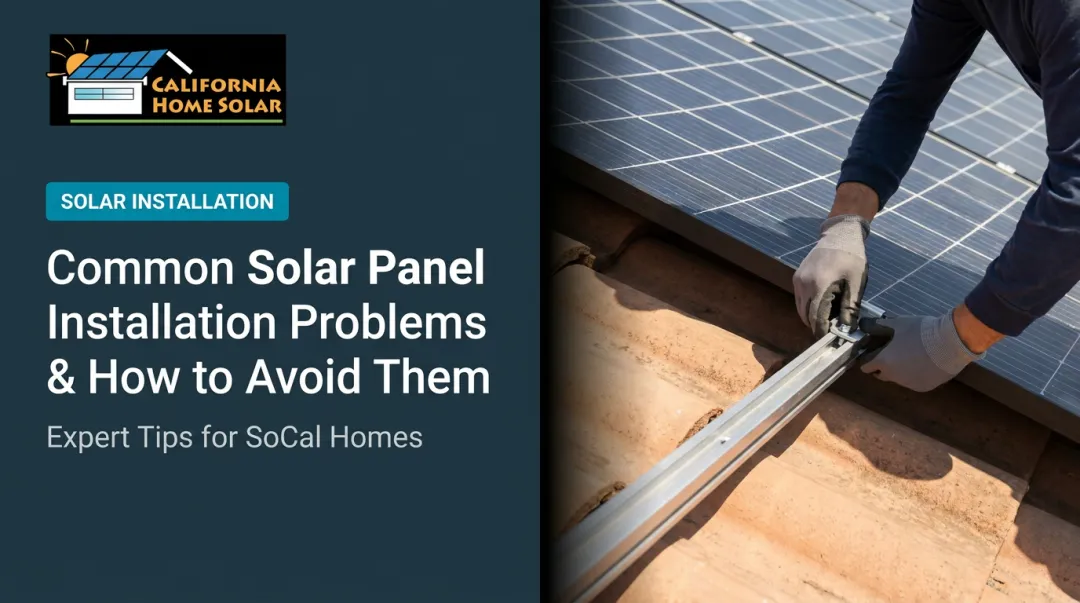
Step 2: Mount the Racking System
Attach flashings directly to roof rafters at each marked point. This is the most waterproofing-critical step in the installation.
A few things matter here:
- Flashings must be seated directly against the rafter, not just the decking
- Sealant around lag bolts must be UV-rated and applied correctly
- Tile roofs — common throughout Los Angeles County — require tile-replacement flashing hardware, not asphalt shingle components. IronRidge's Tile Replacement Flashing Installation Manual requires matching the flashing to the tile profile specifically
Once flashings are set, bolt racking rails to them and verify they are level and torqued to manufacturer specifications.
Step 3: Install Inverter and Electrical Components
Electrical rough-in happens before panels go up, which keeps conduit runs accessible and avoids working around a loaded array. Mount the inverter in a shaded, accessible location, typically a garage wall or shaded exterior wall. Run conduit from the roof to the inverter, and from the inverter to the main electrical panel. Install DC disconnect near the array and AC disconnect near the inverter.
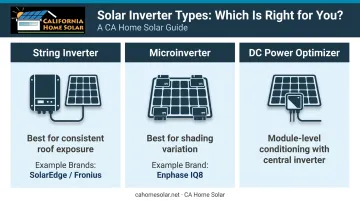
Inverter type determines how conduit is routed and how panels are wired:
- String inverters (such as SolarEdge or Fronius) work well for roof planes with consistent exposure
- Microinverters (such as Enphase IQ8 series) perform better on roofs with shading variation, since each panel converts independently
- DC power optimizers offer module-level conditioning while still routing DC to a central inverter
Step 4: Install and Wire Solar Panels
Slide panels onto rails and secure with end clamps and mid clamps. Connect panels in series or parallel per the approved system design. Connect panel wiring to the inverter input and ensure all MC4 connectors are fully seated and weatherproofed.
Monocrystalline panels are the standard for Southern California installations. They represented 96% of global solar shipments in 2022 according to DOE data, with typical efficiency running 20–22%.
Step 5: Connect to the Main Electrical Panel and Label
Install a dedicated solar breaker sized to the system's output. Connect inverter output wiring to the breaker. Then complete all required labeling before calling for inspection.
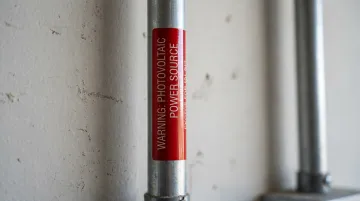
LADBS requires permanent labels on DC conduits and enclosures with:
- 3/8-inch white letters on a red background
- Text reading: "WARNING: PHOTOVOLTAIC POWER SOURCE"
- Placed every 10 feet and within 1 foot of turns or penetrations
Missing labels are one of the most common reasons residential solar installations fail their first city inspection in Los Angeles.
Post-Installation Validation
With labeling complete, validate the system before scheduling the city inspection. A failed inspection in LA County delays the utility interconnection application from even starting — so it's worth the extra hour up front.
Run through these checks:
Structural and visual:
- All roof penetrations sealed with UV-rated sealant
- Panels level with no visible movement in the racking
- No exposed or unsupported wiring along the conduit run
Functional:
- Power on the inverter and confirm it registers panel output
- Monitoring system shows production data with no fault or ground fault codes
- System shuts down safely when the AC disconnect is opened (this verifies the required anti-islanding function — California requires all inverters to be certified to UL 1741 SB per CPUC Rule 21)
Common Solar Panel Installation Problems and Fixes
Even professionally planned installations encounter recurring issues. Here are the three that cause the most delays in Southern California.
Roof Leaks at Mounting Points
Problem: Water intrusion around panel attachment points — sometimes appearing only during Southern California's winter rain season, weeks after installation.
Root cause is usually flashings not properly seated against the rafter, insufficient sealant, or the wrong flashing type for the roof material. Tile and asphalt roofs require different hardware, and mixing them up is a common oversight.
Fix: Remove affected panels, re-flash using roof-type-specific hardware, and apply UV-rated roofing sealant. If the roofing material near the penetration points shows existing wear, replace that section at the same time.
System Output Significantly Below Projections
Problem: After PTO is granted, monitored output consistently falls below what was estimated during the sales process.
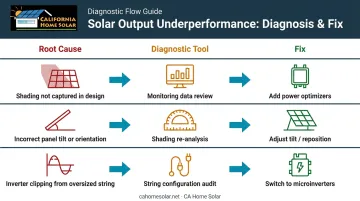
Likely causes:
- Shading not fully captured in the design phase (tools like Google's Project Sunroof can underestimate the impact of nearby trees, chimneys, or HVAC units)
- Incorrect panel tilt or orientation
- Inverter clipping from an oversized string configuration
Fix: Use monitoring data to identify which panels or strings are underperforming. A qualified installer can re-evaluate the shading analysis and determine whether adding power optimizers or switching to microinverters closes the output gap.
Failed City or Utility Inspection
Problem: The building inspector or utility representative flags the installation, blocking PTO.
Common causes per LADBS checklist:
- Wiring doesn't match the submitted permit drawings
- Required labels or signage missing
- Breaker sizing doesn't match system specs on file
- Racking configuration differs from structural calculations
- Inverter not listed to UL 1741 and marked "utility interactive"
Fix: Review the inspection failure report line by line and address every item before scheduling a re-inspection. In LA County, re-inspection scheduling frequently adds 2–4 weeks. That delay is avoidable — catching these issues during internal validation before the first inspection saves significant time on your project timeline.
Pro Tips for Installing Solar Panels Effectively
A few practical considerations that experienced Southern California installers apply:
- Document every phase before panels cover it. Photograph racking attachment points and retain torque records, wiring diagrams, and inspection reports — these are required for warranty claims and become material disclosures during a home sale
- Account for utility interconnection timelines before signing a contract. SCE targets PTO within 10 business days of complete documentation; LADWP's timeline should be discussed with your installer based on current queue conditions. A realistic total timeline — not just installation days — should appear in any proposal
- Verify equipment warranty terms. Leading manufacturers offer 25-year product and performance warranties — for example, Enphase IQ microinverters carry a 25-year limited warranty in the US. Keep all warranty documentation with your installation records
- Know when licensed expertise is non-negotiable. Any work inside the main electrical panel must be performed by a licensed electrician. In California, unpermitted solar installations create legal liability at resale and void most manufacturer warranties
California Home Solar has navigated these requirements throughout Southern California for 36 years. As a Top 500 Solar Contractor and HERO Registered Contractor, they also offer HERO Property Assessed Clean Energy financing directly — zero down, no credit score requirement, with 5–25-year terms.
Conclusion
Installation quality determines how a solar system performs across its 25+ year lifespan. Proper roof flashings, code-compliant wiring, verified interconnection, and thorough documentation are what separate a system that delivers consistent energy savings from one that underperforms, leaks, or creates liability. These steps aren't optional — they're the baseline for a system worth owning.
When evaluating installers, look beyond the lowest bid. Key criteria to check:
- Verified California contractor licensing and bonding
- Local permit history with LA-area building departments
- Demonstrated experience with your utility's interconnection process
- References from completed projects in your area
The cost of rework, a failed inspection, or post-installation roof repair consistently exceeds any upfront savings from cutting corners.
Contractors like California Home Solar — with 36 years serving the LA and Southern California market — bring the permit familiarity, utility relationships, and hands-on experience that make the difference between a smooth installation and a costly one.
Frequently Asked Questions
How much does it cost to install a solar panel system?
According to LBNL's Tracking the Sun 2024 report, residential installed prices ranged from $3.20 to $5.50 per watt in 2023, with California's median system size at 6.6 kW. The federal Residential Clean Energy Credit covers 30% of qualifying installation costs for systems placed in service through 2032, which reduces your net installation cost.
How long does solar panel installation take from start to finish?
Physical installation typically takes 1–3 days. However, the full process — from contract signing through permission to operate — takes 2–4 months on average in Southern California, with permitting and utility interconnection accounting for most of that time.
Do I need a permit to install solar panels in California?
Yes. Permits from the local AHJ are required before any work begins on a grid-tied system. Licensed installers handle the permit application on the homeowner's behalf as part of a full-service installation — this is included in the process, not an add-on.
Can I install solar panels myself, or do I need a professional?
California requires a licensed contractor (C-46 or C-10) for grid-tied systems. Unpermitted installations fail utility interconnection requirements, create legal liability at resale, and void most manufacturer warranties. The risks far outweigh any labor savings.
What happens after solar panels are installed?
The city building inspector must review and approve the installation first. After passing inspection, the installer submits the interconnection package to LADWP or SCE. The system cannot legally be turned on until the utility issues Permission to Operate (PTO).
How do I know if my roof is suitable for solar panels?
A site assessment evaluates roof age and remaining useful life, structural load capacity, panel orientation (south- or west-facing is ideal in Los Angeles), and a shading analysis across all hours. This assessment happens before any design work or contracts are finalized.