Before a single panel goes up, your roof determines whether that investment pays off for 25+ years or creates expensive problems down the line — think mid-system re-roofing, water intrusion at mounting points, or voided warranties. A weak or poorly prepared roof undermines even the best solar system.
This guide covers every preparation step: what to inspect, what to repair, what structural criteria your roof must meet, and the regional factors specific to Southern California that affect installation readiness.
Key Takeaways
- Roof preparation is as critical as the solar equipment — skipping it causes costly delays and damage
- Your roof needs at least 10 years of remaining life, adequate structural load capacity, and good sun exposure
- Always start with a professional inspection, then address repairs, shading, and obstructions
- Southern California homeowners face specific requirements: fire-rated materials, HOA notifications, and utility interconnection approvals
- A contractor who handles both roofing and solar under one roof eliminates coordination gaps and keeps the project on schedule
How to Prepare Your Roof for Solar Panel Installation
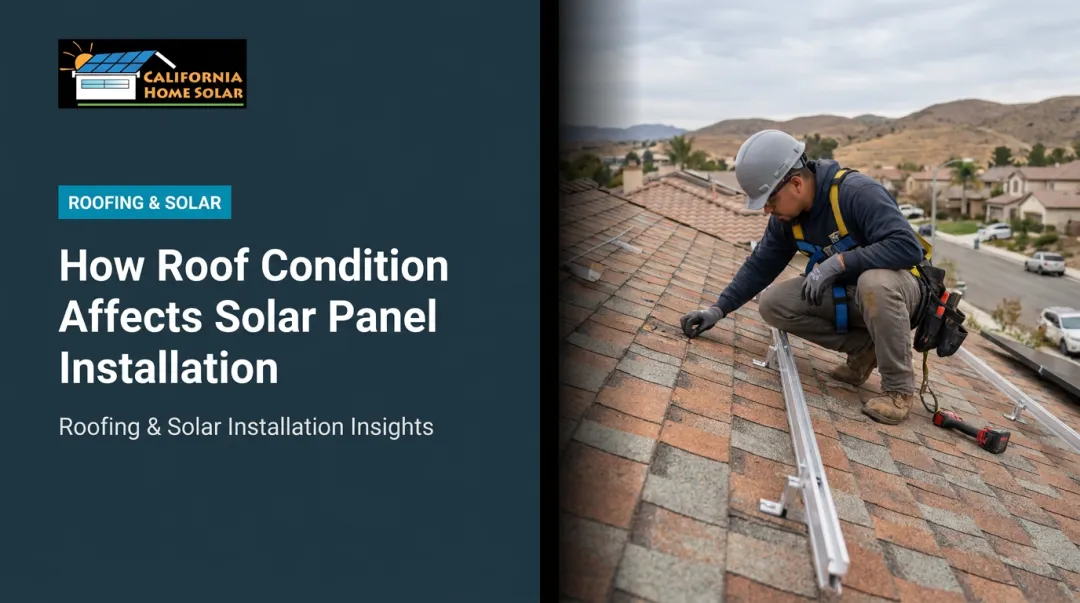
Step 1: Schedule a Professional Pre-Installation Roof Inspection
A qualified inspector examines what you can't see from the ground — hidden leaks, soft spots, compromised decking, and deteriorated flashing. This single step prevents the most expensive solar preparation mistakes.
The inspection also establishes remaining roof lifespan. If fewer than 10 years remain, replace the roof before installing solar. Removing an entire panel array mid-system for a roof replacement costs far more than doing both projects together upfront.
California Home Solar conducts pre-installation assessments as part of its end-to-end process, helping homeowners across Southern California identify structural and material issues before they become costly surprises. Because the company also handles roofing remodeling, any issues found can be addressed by the same team without coordinating a separate contractor.
Step 2: Complete All Roof Repairs Before Installation Day
Any issues identified during inspection — cracked or missing shingles, deteriorated underlayment, active leaks, or weakened decking — must be resolved before racking is mounted. Drilling into a compromised roof creates entry points for water damage that compound over time.
Complete repairs well before your scheduled installation date. Permit applications and utility interconnection timelines depend on it. Delays discovered on installation day push everything back by weeks.
Step 3: Assess and Optimize Sun Exposure
Roof orientation directly affects how much power your system produces. According to NREL's PVWatts modeling for Los Angeles, a south-facing 1 kW roof-mounted system generates approximately 1,704 kWh AC per year. A comparable west-facing setup produces around 1,420 kWh AC per year — still viable, but roughly 17% less annual output.
Shading can quietly undercut production far more than orientation alone. NREL research found that shading more than 40% of a single cell can cause total power loss for the entire cell group protected by that bypass diode. A tree that seems minor in winter casts heavy shade in summer — exactly when production matters most.
Before installation:
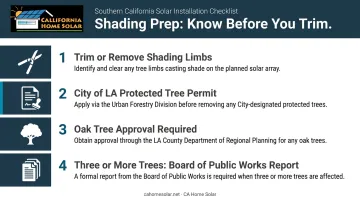
- Trim or remove limbs that cast shadows across the planned panel area
- Note that in the City of Los Angeles, removing protected or native trees requires a permit from the Urban Forestry Division
- Oak trees in LA County require approval from the Department of Regional Planning before removal
- If three or more trees are proposed for removal in the City of LA, a report must go before the Board of Public Works
Step 4: Clear Obstructions on the Roof Surface
Roof vents, antennas, satellite dishes, and HVAC equipment in the proposed panel zone need to be relocated before installation begins. Plumbing stack vents require particular care — relocating one is a plumbing alteration that falls under the 2025 California Plumbing Code, and contracted work meeting CSLB thresholds typically requires a licensed C-36 plumbing contractor.
Ground-level clearance matters too. Patio furniture, garden equipment, and vehicles parked near the house restrict ladder and equipment access. Clear a working perimeter before the installation crew arrives.
Step 5: Verify Electrical Panel Readiness
Solar connects directly to your home's main electrical panel. Older panels rated below 200 amps often need upgrading before the system can be properly interconnected with SCE or LADWP. Finding this out on installation day stalls the entire project.
Check for these before your installation date:
- Panel amperage rating (200 amps is the standard threshold for solar interconnection)
- Available breaker slots for the solar disconnect and inverter feed
- Any existing electrical issues flagged during your home inspection
Scheduling electrical upgrades in advance keeps the project on track and ensures your system is grid-ready from day one.
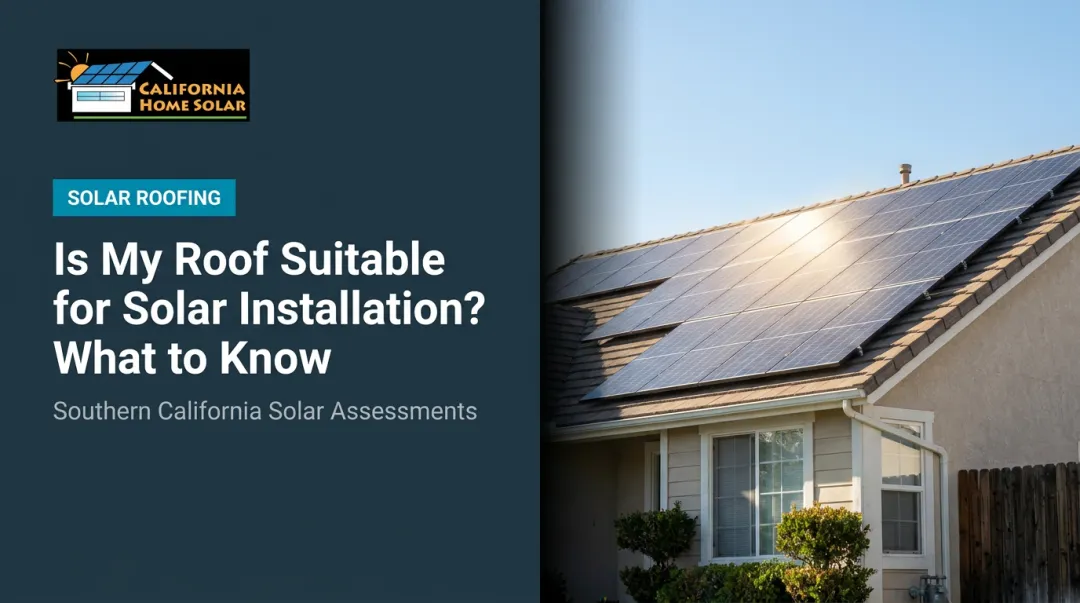
What Your Roof Must Have to Support Solar Panels
Not every roof is automatically solar-ready. These four criteria determine whether installation can proceed safely.
Structural Load Capacity
Solar panels and racking hardware add weight. The DOE's Renewable Energy Ready Home guide indicates a conventional residential PV system typically adds approximately 6 psf of dead load — confirm your roof structure can carry that before committing to a layout.
For older homes in the San Fernando Valley, Pasadena, or other established LA neighborhoods, this isn't a given. A structural engineer or certified inspector should confirm your specific roof's capacity before installation.
Southern California's seismic environment adds another layer of complexity. Mounting hardware must hold under both standard loads and earthquake movement — this is an AHJ and engineering review item, not something a general installer can self-certify.
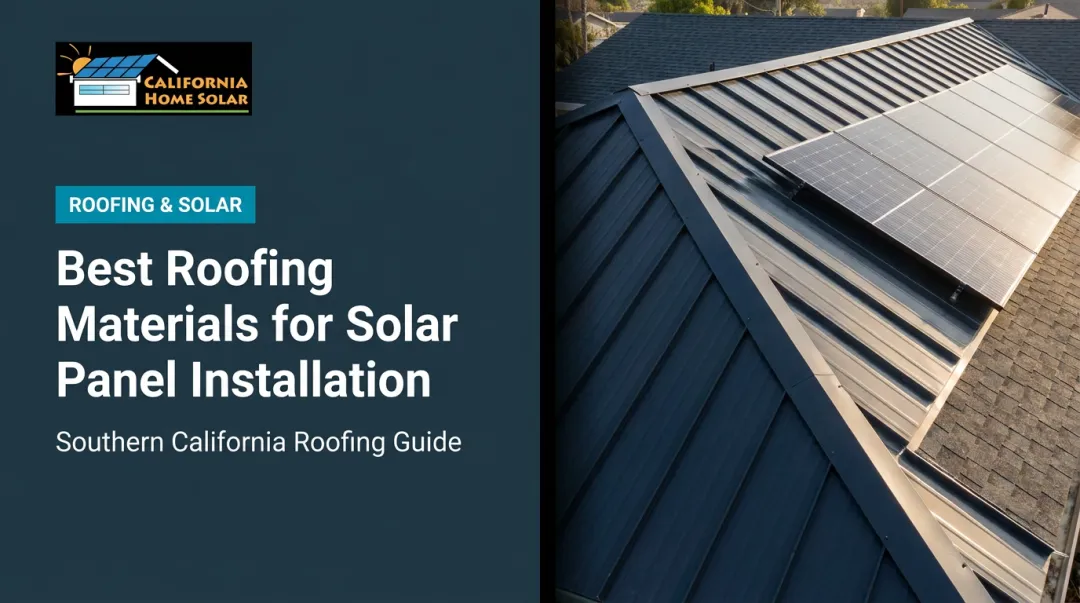
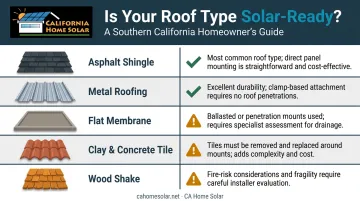
Roof Material Compatibility
| Material | Solar Compatibility |
|---|---|
| Asphalt shingles | Easy — standard mounting hardware |
| Metal roofing | Easy — clamp-based systems, no penetrations needed |
| Flat membrane (TPO, EPDM) | Compatible — ballasted or tilted racking systems |
| Clay or concrete tile | Compatible, but requires experienced installers and specialized hardware |
| Wood shake | Complex — often requires underlayment replacement before install |
Clay tile roofs are common across LA's older neighborhoods and hillside communities. They're compatible with solar, but improper drilling or mounting cracks tiles and creates leak pathways. This is one area where installer experience matters. California Home Solar's 36 years of work across Southern California and Orange County includes hands-on familiarity with the tile roofs that dominate much of the region.
Remaining Roof Lifespan
Solar panels are designed to last 25–30 years. A roof with 5–7 years of life left will need replacement mid-system, requiring full panel removal and reinstallation — effectively doubling your labor costs.
If a roof replacement is already on your horizon, do both projects simultaneously. Combining them under one contractor typically saves thousands in removal and reinstallation labor down the road.
Roof Pitch and Available Space
Roof angle affects panel output and installation hardware configuration. PVWatts modeling uses site-specific tilt inputs — the DOE's solar-ready guide recommends targeting array locations that achieve above 75% of the optimal solar resource for your location rather than assuming a fixed ideal angle applies universally.
For system sizing, DOE planning guidance calls for roughly 100 square feet of usable roof space per 1 kW of capacity. Here's how that plays out in practice:
- Median residential system size reached 7.4 kW in 2023, per LBNL's Tracking the Sun 2024 report
- Most systems fall between 5–11 kW
- That range requires roughly 500–1,100 square feet of usable roof area
Key Factors That Affect Roof Readiness in Southern California
Beyond the universal checklist, LA-area homeowners face regional variables that directly affect whether — and how — installation can proceed.
HOA and Local Permit Requirements
Communities in Calabasas, Rolling Hills, Palos Verdes, and similar areas often have HOA rules governing roof aesthetics and panel placement. California Civil Code Section 714 makes HOA rules that effectively prohibit solar void and unenforceable — but for photovoltaic systems, an HOA restriction becomes legally significant only if it adds more than $1,000 to the system cost or reduces efficiency by more than 10%.

You still need to notify your HOA and file for permits with the local building department before work begins. Skipping either step can result in project shutdowns and removal orders.
Fire-Rated Roofing Materials
California's fire hazard severity zone classifications affect many communities in the California Home Solar service area, including Malibu, Topanga, and Antelope Valley. In Very High Fire Hazard Severity Zones, roofing assemblies typically need to meet Class A fire ratings per ASTM E108 and UL 790 standards.
Rooftop PV panels must also be tested and listed with a fire classification. An experienced local contractor will confirm compliance during the pre-installation review, not at the inspection phase.
Utility Interconnection Requirements
SCE and LADWP each have their own interconnection application and approval processes. SCE states that standard solar-only requests with complete documentation are normally reviewed within 5 business days, though processing times vary with application volume. Starting permitting early is the most reliable way to avoid the delays that slow most solar projects down. California Home Solar manages this process as part of its standard installation service, so homeowners don't have to navigate the paperwork alone.
Common Mistakes Homeowners Make When Preparing for Solar
A few preparation missteps consistently cost homeowners thousands — and most are easy to avoid with the right planning upfront.
- Skip the professional inspection and hidden structural issues, water infiltration, or an aging deck only surface mid-installation, when repairs are far more expensive to execute.
- Install on a roof with 5 years or less of life remaining and you'll pay full labor costs twice — once now and again when the roof fails and panels must come off for replacement.
- Underestimate shade sources and panels sized for full sun will underperform year-round. Trees that cast light shadows in winter often block significant production by summer.
Conclusion
Successful solar installation in Southern California starts before any equipment arrives. A structurally sound, properly oriented, well-maintained roof is the foundation — without it, the best panels on the market underperform or create long-term problems.
Partnering with a contractor who handles both roofing and solar removes the coordination risk of managing separate vendors. California Home Solar's 36 years of experience across Southern California means pre-installation assessments, roof readiness reviews, and full solar installation are handled by one team. One point of contact from first inspection through final system activation means fewer delays, clearer accountability, and a smoother path to your first bill savings.
Frequently Asked Questions
How do you prepare your roof for solar panels?
Schedule a professional inspection first, then complete any needed repairs. Assess sun exposure, trim shading sources, confirm structural load capacity and material compatibility, clear roof obstructions, and verify your electrical panel is adequate before installation day.
How much does a solar system cost for a typical Southern California home?
Using NREL's 2024 benchmark of $2.68/W, a typical 7–8 kW residential system runs $19,000–$22,000 before incentives. The 30% federal Residential Clean Energy Credit applies through December 31, 2025; if your system goes live in 2026 or later, confirm current credit availability with a tax professional. PACE financing can spread costs over 5–25 years with no upfront payment.
What roof types are compatible with solar panels?
Asphalt shingle, metal, and flat membrane roofs are the most straightforward to work with. Clay tile and concrete tile roofs — common throughout the LA area — are compatible but require specialized mounting hardware and experienced installers to avoid cracking tiles during installation.
Should I replace my roof before installing solar panels?
Yes, if your roof has fewer than 10 years of remaining life. Doing both projects at the same time costs significantly less than removing a full solar array for a mid-system roof replacement — which effectively requires paying for installation labor twice.
How long does roof preparation take before solar installation?
An inspection can usually be scheduled within a few days. If repairs or a full replacement are needed, the preparation phase adds several weeks. HOA notifications and building permits in California add additional lead time — plan for the full process to take 4–8 weeks before installation can begin.
Can solar panels damage my roof if it's not properly prepared?
Yes. Panels mounted on a deteriorated or structurally weak roof can cause leaks at penetration points, accelerate existing damage, and void the roofing warranty. Proper flashing, a pre-installation inspection, and professional installation are what prevent this.