Many homeowners treat this step as a formality. It isn't. The quality of your assessment directly determines system size, panel placement, energy production estimates, and long-term return on investment. A rushed or incomplete evaluation is one of the most reliable paths to an underperforming system.
This guide walks Southern California homeowners through exactly what a residential solar site assessment involves — what to prepare, each step of the process, the variables that most affect results, and the mistakes that routinely cost homeowners money.
Key Takeaways
- A residential solar site assessment evaluates your roof, shading, electrical system, and energy usage — the foundation of any accurately designed solar system.
- Preparation matters: 12 months of utility bills and basic property info are required before meaningful sizing can begin.
- Roof orientation, tilt, shading, and electrical panel capacity all require direct measurement, not estimation.
- Under NEM 3.0 (SCE) and LADWP's separate net metering rules, sizing strategy now prioritizes self-consumption and battery storage.
- Professional shading analysis and an on-site electrical review are both required for a reliable system design.
What You Need Before Starting a Residential Solar Site Assessment
Preparation directly affects assessment accuracy. An assessor working from incomplete data makes assumptions — and those assumptions can throw off system sizing and savings estimates significantly.
Energy Usage and Property Documents
Gather these before any assessor visits:
- 12 months of electricity bills to capture seasonal peaks and establish a true annual kWh baseline
- Current rate plan: time-of-use vs. tiered pricing affects how savings are calculated under California's NEM 3.0 structure
- Utility provider (SCE customers fall under the Solar Billing Plan, effective April 15, 2023; LADWP operates under a separate NEM structure with different credit mechanics)
- Property survey or roof drawings, if available
Site-Specific Information to Gather
Before the physical visit, document:
- Roof age and material: roofs older than 10 years may need replacement before panels go on
- HOA restrictions, since some associations limit panel visibility or placement options
- Planned future loads (EV charging, pool equipment, home additions) — these affect how large the system needs to be
Contractor Readiness
Homeowners can handle all of the above on their own. The physical on-site evaluation — roof access, shade measurements, electrical panel inspection — requires a licensed solar contractor with professional tools.
When vetting contractors, look for NABCEP certification and a California contractor license. California Home Solar offers on-site assessments for homeowners across the Los Angeles area and assigns a dedicated project manager to each job from first consultation through permission to operate.
How to Perform a Residential Solar Site Assessment
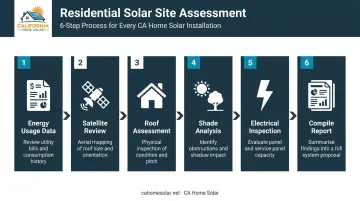
Step 1: Gather Energy Usage Data and Define Your Goals
Pull 12 months of utility bills and calculate total annual kWh consumption. Note your utility provider — SCE or LADWP — since each has different rules for how exported solar energy is credited.
Clarify your goals upfront:
- Are you targeting 80–100% usage offset?
- Do you want battery backup for outages or evening use?
- Are you adding an EV charger within the next few years?
These decisions affect system size, panel count, and whether battery storage should be designed in from day one. Under SCE's Solar Billing Plan, exported energy is credited hourly based on avoided-cost pricing — not at retail rates — which makes self-consumption goals central to sizing strategy.
Step 2: Pull Satellite Imagery and Review the Property Remotely
Before the physical visit, use Google Earth or Google Project Sunroof to get a preliminary read on roof dimensions, orientation, and visible obstructions. This narrows which roof sections are likely solar-productive and helps the assessor prioritize during the site visit.
Flag obvious issues from aerial view:
- Large trees or neighboring structures near the roofline
- HVAC units, chimneys, or skylights on usable roof sections
- Roof sections that face away from south
Satellite tools are useful for early screening, but not a replacement for on-site measurement. Project Sunroof's own methodology notes that imagery may be stale and that small obstructions can be missed.
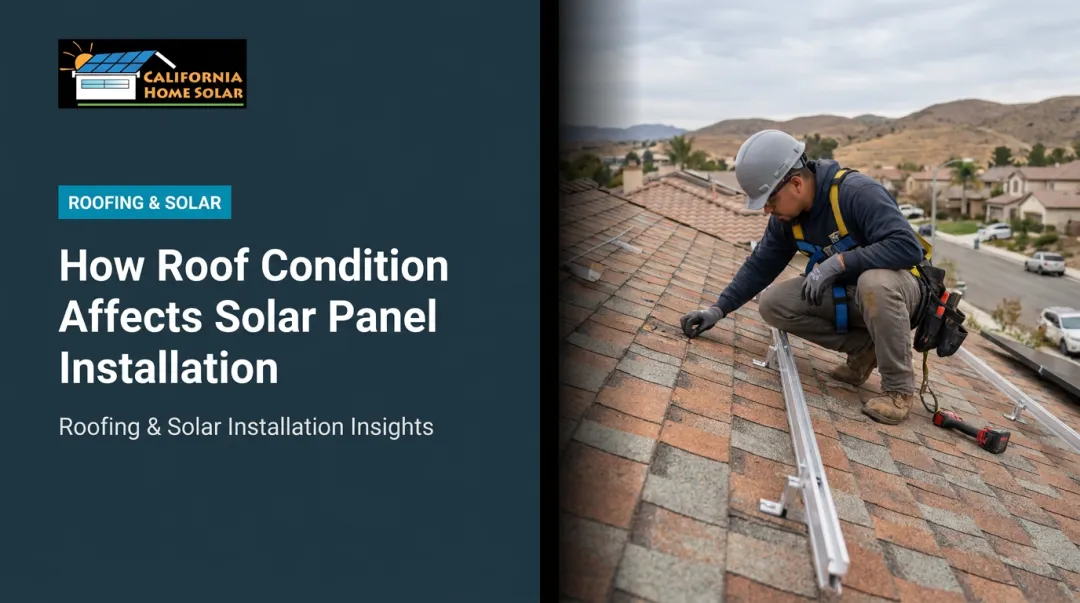
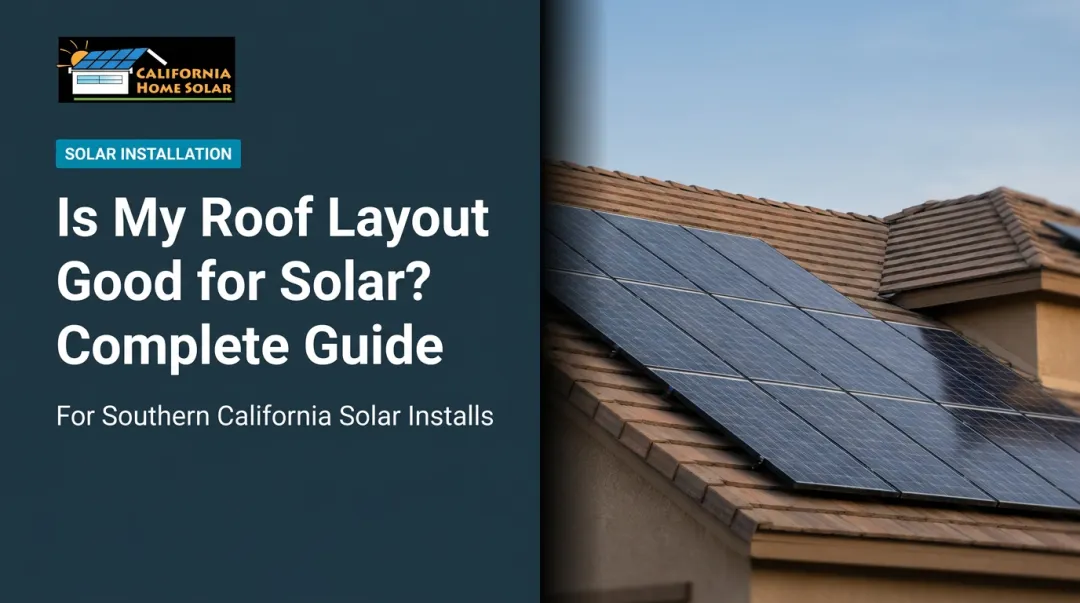
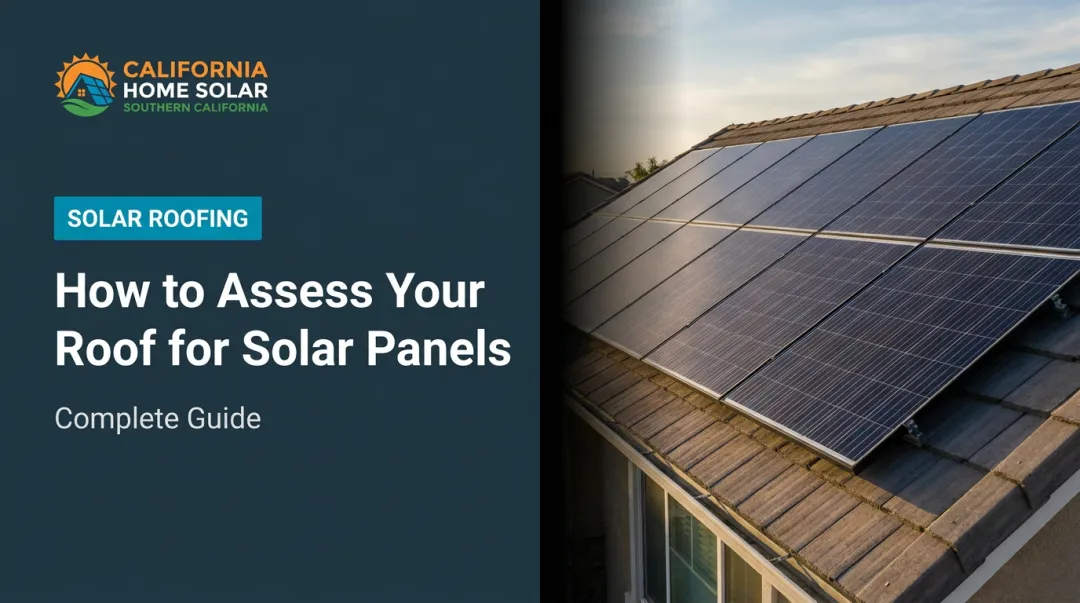
Step 3: Assess Roof Condition, Dimensions, and Orientation
On-site, document the following for each roof plane:
| Measurement | Why It Matters |
|---|---|
| Total usable area (sq. ft.) | Determines how many panels physically fit |
| Pitch / tilt angle | Affects annual energy yield; 18–34° is optimal in Southern California |
| Azimuth (compass direction) | South-facing = best production; east/west planes viable with proper inverter setup |
| Roof material | Affects mounting method and structural load calculations |
| Estimated remaining roof life | Roofs that need replacement within a few years should be addressed before installation |
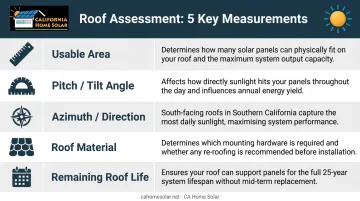
If the roof needs work, that's not a disqualifier — it's a planning item. California Home Solar's integrated roofing and solar services mean roof replacement and panel installation can be coordinated under one project.
Step 4: Perform a Shade Analysis
Shading causes more production loss than any other site variable, which is why it requires dedicated measurement tools. Use a professional tool (Solmetric SunEye, Solar Pathfinder, or software like Aurora Solar) to capture shade readings at multiple points across each roof plane.
NREL research found that Aurora's annual solar access values matched Solmetric SunEye measurements within ±3 SAV where LIDAR data was available and ±5 SAV without it, confirming that professional-grade tools produce reliable results.
What shade analysis must account for in Southern California:
- Deciduous trees (foliage changes seasonally, affecting winter production)
- Neighboring buildings and fences at different sun angles
- Future tree growth, which compounds shading losses over time
String-inverter systems are particularly vulnerable: shading one module in a string reduces output across the entire string. NREL's shading testbed found that module-level power electronics recovered 25–35% of annual shading losses compared to a standard string inverter.
For partially shaded rooftops, which are common in LA's tree-lined neighborhoods, microinverters or DC optimizers are often the right call.
Step 5: Inspect the Electrical System
The electrical review determines how the solar inverter and any battery system will connect to your home, and whether upgrades are needed before installation.
Document the following:
- Main panel amperage and busbar rating — California's Solar Permitting Guidebook applies the 120% busbar rule; a 100A busbar with a 100A main allows only a 20A PV breaker
- Available breaker space — no open slots means a panel upgrade or sub-panel addition
- Utility meter location and service entrance
- Grounding system adequacy
- Location of sub-panels or transfer switches
Photograph everything. This documentation feeds directly into the permit application and interconnection request.
Step 6: Document Structural Information and Compile Findings
Record rafter size, spacing, and span for each roof section that will carry panels. This structural data is required by engineers to confirm the roof can safely handle the added load.
What the site report should include:
- Annual kWh usage and peak months
- Roof measurements, tilt, and azimuth by plane
- Shading loss percentages by roof section
- Electrical panel specs and any upgrade requirements
- Structural notes by facet
This report becomes the input for system design software to generate accurate production estimates and a permit-ready layout.
Key Factors That Affect Your Solar Site Assessment Results
Two homes on the same street can end up with completely different solar recommendations — because site conditions, utility rules, and panel capacity all compound each other. Here's what assessors actually measure and why each one changes the outcome.
Roof Orientation and Tilt Angle
South-facing roofs at 18–34° pitch receive the most consistent direct sunlight throughout the year in Southern California. East and west-facing planes can still be productive — especially with string optimizers or microinverters — but orientation affects how large a system needs to be to hit a given offset target.
Flat roofs aren't a barrier, either. Tilted racking systems can be installed to approximate optimal angles and recover most of the production loss.
Shading from Trees, Structures, or Equipment
Unlike orientation (which is fixed), shading varies by time of day, season, and how vegetation grows. An assessor who eyeballs shading instead of measuring it is guessing — and those guesses lead to systems that underperform from day one.
Professional shade analysis tools model not just today's conditions but how tree growth over the next 10–15 years will affect production — a detail that significantly changes panel placement and system sizing.
Local Utility Rules and NEM Policy
Your utility determines how exported solar energy is valued — and that directly affects system sizing strategy.
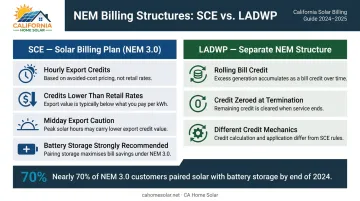
- SCE customers fall under the Solar Billing Plan (NEM 3.0). Export credits are calculated hourly based on CPUC Avoided Cost Calculator values — not retail rates. Midday exports may carry lower value than evening consumption.
- LADWP customers use a separate NEM structure where excess generation creates a bill credit that rolls forward; any remaining credit at service termination is set to zero.
The practical result: assessors should model hourly production and load shapes, and battery storage sizing has become a core part of the assessment — not an afterthought. By end of 2024, nearly 70% of NEM 3.0 customers paired solar with battery storage.
Electrical Panel Capacity
A 100-amp panel doesn't automatically disqualify a home from solar, but it does limit system size. The allowable PV backfeed depends on busbar rating, main breaker size, breaker placement, inverter output, and whether battery storage is included.
Catching these limits during the assessment rather than at installation prevents change orders, permit delays, and budget overruns that could have been avoided with a thorough upfront review.
Common Mistakes Homeowners Make During a Solar Site Assessment
Relying solely on tools like Google Project Sunroof. Satellite-based calculators can't account for your specific shading, roof pitch, electrical capacity, or HOA restrictions — production estimates from these tools are far less accurate than a professional on-site analysis.
Providing only one or two months of utility bills. A partial consumption baseline almost always results in an undersized system that misses your offset goals — or an oversized one earning minimal compensation under NEM 3.0.
Ignoring roof age before committing to installation. If your roof needs replacement within a few years, you'll pay to remove and reinstall the panels later — a proper assessment flags this upfront so you can factor in the cost or replace the roof first.
Underestimating future tree growth. Minor shading today compounds significantly as trees mature, and a thorough assessment models that growth to determine whether trimming or panel repositioning makes sense before you install.
What to Do After Your Solar Site Assessment
Review the Report Before Signing Anything
A complete assessment report should include:
- System size recommendation and estimated annual kWh production
- Shading loss percentage
- Financial projections (payback period and 25-year savings)
- Any required pre-installation work
Review these figures carefully and compare them across at least two or three proposals before committing.
Understand the Permitting and Interconnection Timeline
Across Southern California — whether you're in LA County working with SCE or LADWP, or in Orange County served by SCE — interconnection approvals add time to every project. Your contractor should submit the interconnection application early and have direct experience with your local AHJ permit requirements. California Home Solar has navigated permitting across dozens of Southern California cities over 36 years, and that familiarity reduces the delays that catch less experienced contractors off guard.
Monitor Production After Installation
Once your system is live, track actual monthly output against the estimates in your assessment report. California Home Solar includes 24/7 system monitoring and works with Enphase, SolarEdge, and other inverter platforms that give you real-time visibility into performance. Significant deviations in the first 3–6 months are worth flagging to your installer right away.
Frequently Asked Questions
How long does a residential solar site assessment take?
An on-site assessment typically takes 2–4 hours, covering the roof inspection, shade analysis, and electrical review. The written proposal or system report usually follows within 3–7 business days, depending on the contractor.
Is a solar site assessment free?
Most licensed solar installers, including California Home Solar, offer on-site assessments at no cost as part of the sales process. Independent third-party assessments from engineering firms may carry a fee but provide unbiased analysis — useful for complex properties or when comparing multiple proposals.
Can I perform a solar site assessment myself?
Homeowners can handle the prep work: collecting utility bills, noting roof age, flagging HOA restrictions. The physical assessment itself requires professional tools for shade analysis and electrical inspection. Smartphone shade-estimation apps are not accurate enough to base system sizing decisions on.
What should I do to prepare my home before a site assessor visits?
Have these ready before the assessor arrives:
- 12 months of utility bills
- Clear access to your electrical panel and attic
- Roof age and material information
- A list of future energy loads you expect to add (EV charging, pool pumps, planned additions)
What happens if my roof fails the solar site assessment?
A roof that's too old, damaged, or structurally insufficient doesn't disqualify you from going solar — it means roof work needs to happen first. Contractors like California Home Solar offer coordinated roofing and solar installation, which can simplify scheduling and reduce overall project cost.
How accurate are the energy production estimates from a site assessment?
Professional assessments using tools like Aurora Solar or HelioScope with measured shading data are typically accurate to within 10–15%. Satellite-only tools or online calculators without on-site measurements carry significantly more uncertainty — enough to affect system sizing and financial projections.